How to Change a Table Layout
Questions & Answers
Q: “I just bought a used blackjack table and I need to change the layout so I can practice a different game. How do I change my table layout into something new?”
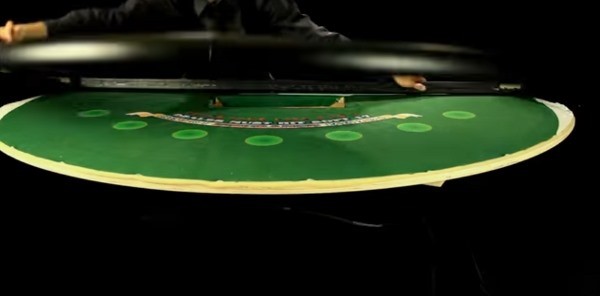
A: Casinos employ carpenters to build their blackjack tables and to also change the table layout when they need to. Sometimes you’ll see these people in the casino late at night, changing a table layout or two. I’m not sure the exact procedure that they use to change their layout, but I’m going to show you how I change my layout.
The first thing you’ll want to do is remove anything that’s loose on top of the table. This includes the cards, the paddle, the bank with all of the cheques in it, the past couple weeks of mail, your keys and anything else you’ve been tossing on your table while you haven’t been using it.

With a Philips screw driver, unscrew the screws that are holding down the discard rack and the drop box cover and remove them from the table. If your padding cover is screwed into the table, then you’ll need to unscrew that as well. Lift the padding cover off of the table and set it to the side or up against the wall.
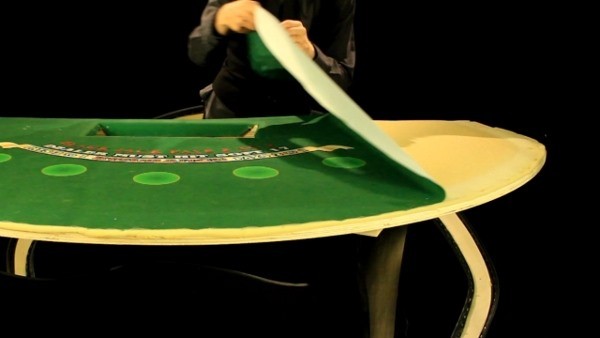
Now it’s time to remove the layout. The layout is usually kept in place with staples from a staple gun, so use whatever tool you have for removing staples from a staple gun. I normally use my trusty pocket knife that I’ve had forever. This pocketknife gets the staples out far enough that I can use a pair of pliers to pull the staple the rest of the way out.

After spending some time taking out all of the staples, you’re now able to remove the table layout. You’ll notice that the table is just a slab of wood with a foam-like covering over it.
Place the new game layout onto the table and spread it so that it fits the entire width and length of the table. Now is a good time to smooth all of those wrinkles out. Once that’s done, it’s time to use the staple gun and stretch the layout. It’s called stretching because you actually stretch the cloth so that there are no wrinkles or slack anywhere on the table.
When you first start off, keep in mind that the layout is not attached to anything, so there is no need to stretch because all that would do is move the layout out of position. We need to get a few staples in, first, before we can start stretching.

I’ll usually start on the side of the table and put a few staples in, before moving across from my location. I’ll make sure the layout is in its correct position before very gently stretching it. I’ll keep in mind that I don’t want to move the layout too much but I do want to get rid of any wrinkles that might be on the table. Then I’ll keep moving from area to area, all of the while stretching the fabric so that there are no wrinkles or slack in it.
Keep doing this until the entire area has been stretched and stapled down. Once that’s done, we need to put everything back. Place the padding cover back on the table and screw it in.
Place the discard rack and the drop box cover in their correct positions and screw them into the table. Once everything is screwed into its specific location, place the bank back into its hole. You have just successfully changed your 1st casino table layout. Congratulations! Now you can play any game you want!
Related Article Archives
Related Articles
Trying to Find Certainty When Everything’s Just a Giant Dice Roll
Posted Aug 26th, 2025
Interview: Tuomas Kallio on Finland’s Gambling Market Shake-Up
Posted Aug 26th, 2025
Understanding Slot Volatility: What Every Dealer and Player Should Know
Posted Sep 29th, 2025
Why Do Some Players Always Seem to Win More Than Others?
Posted Sep 30th, 2025
Understanding Tax-Free Winnings for Finnish Players: Rules, Licenses, and Pitfalls
Posted Oct 14th, 2025
The Hidden Mathematics That Powers Modern Casino Favorites
Posted Sep 30th, 2025

